By Liangyu Laser Technical Team | 15-min read
Cold Foil Adhesive Selection for Label Presses and Materials
Table of Contents
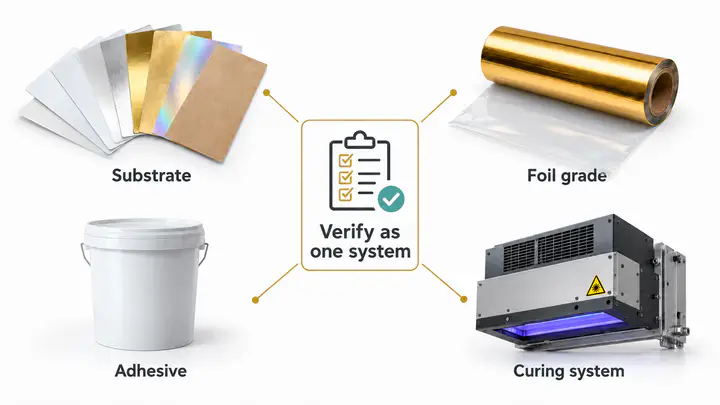
Cold foil adhesive selection starts with the press process, final substrate, foil grade and curing system. Choose an adhesive documented for that combination, then verify laydown, release, coverage, adhesion and overprint at production speed. Approve the finished label, not just the metallic image, and retain the material codes and trial settings before ordering rolls.
A silver panel can look clean as it leaves the transfer unit and still fail when ink is printed over it or the label wraps around a bottle. Before blaming the foil, check what the adhesive was selected to do. A flexo formulation, an offset adhesive and a generic UV coating are not interchangeable purchase specifications.
Already have a material and adhesive code? Send your cold foil sample brief with the press, lamp type, target speed and intended finish.
Match the Adhesive to the Printing Process First
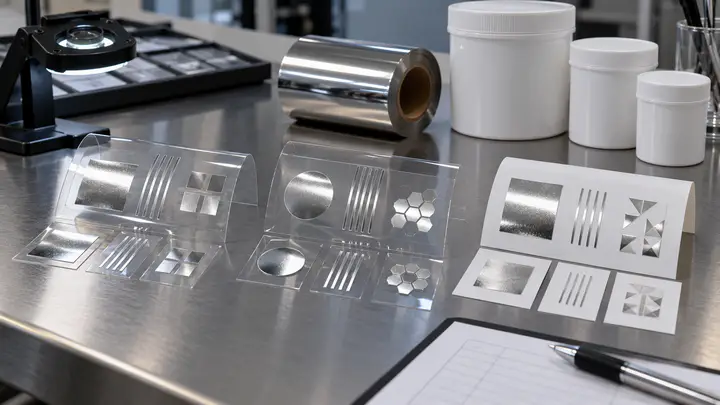
The first filter in cold foil adhesive selection is how the adhesive image is applied and how the bond develops. Identify the actual press route before comparing product codes.
| Press Route | Adhesive Direction to Confirm | Trial Priority |
|---|---|---|
| UV flexo, mercury curing | Flexo cold foil adhesive for the installed lamp and foil system. | Wetting, laydown, through-cure where applicable, release and adhesion. |
| UV LED flexo | LED-compatible or documented dual-cure flexo adhesive. | Specified wavelength, actual exposure, foil compatibility and target speed. |
| UV or LED sheet-fed offset | Offset cold foil adhesive for the press and drying system. | Image transfer, adhesive/ink sequence, release and overprinting. |
| Conventional sheet-fed offset | Conventional offset adhesive and matching transfer foil. | Bond development, ink compatibility and handling sequence. |
| Digital adhesive application | Materials approved for the specific digital transfer module. | Jetting/application requirements, foil, cure sequence and finished result. |
7 Essential Checks for Cold Foil Adhesive Selection
1. Get the Exact Adhesive Code and Current Technical Data
Ask for the product code, current technical data sheet, intended printing process, compatible curing systems, storage limits and trial recommendations. The phrase “UV glue” leaves too much unanswered. Confirm whether the product is intended for cold transfer, rather than general lamination or a pressure-sensitive label bond. Keep the batch and opening date with the trial record.
2. Identify the Surface That Will Receive the Adhesive
Specify the label facestock and its exposed layer: coated paper, treated BOPP, top-coated PET, PP, printed ink or varnish. Two films with the same polymer name can have different topcoats and treatment histories. A printable surface does not automatically prove cold foil compatibility.
3. Confirm UV or LED Cure Compatibility
A change from mercury UV to LED requires documented adhesive compatibility. Record the lamp type, LED wavelength where relevant, lamp condition, exposure geometry and line speed. Nameplate lamp power alone is not proof that enough suitable energy reaches the adhesive.
4. Match the Adhesive With the Actual Foil Grade
Send the foil supplier the adhesive code and process details. A color swatch cannot establish clean release from the carrier or adhesion to the label. Include the smallest positive line, tight reverse gaps and largest solid area in the test artwork.
5. Check Anilox, Viscosity and Laydown Together
For flexo, record anilox volume, line screen, cell condition, plate and doctor-blade setup, plus viscosity measured by the adhesive supplier’s method. A dirty or worn anilox may deliver a different layer from the nominal specification. Start with the adhesive supplier’s application guidance, then assess the printed image and transfer.
Do not adopt a universal BCM, viscosity or coat weight for cold foil adhesive selection. Fine reverse gaps and broad solids make different demands. Too little or uneven adhesive can leave gaps; spreading or excessive laydown can obscure detail. Verify the cause before changing volume.
6. Verify at the Planned Production Speed
Run the candidate combination at the intended speed after establishing stable transfer. Record speed, curing conditions, nip setting and foil tension. Compare startup samples with steady-running samples; a slow proof does not validate a full-speed order.
7. Inspect the Finished Label After Overprint and Handling
Include the intended ink, varnish and later conversion. Check coverage, edge definition, foil adhesion, overprint adhesion and relevant rub, flex or moisture exposure. Agree on conditioning, test method and acceptance criteria before approving the trial.
Run the candidate combination at the intended speed after establishing stable transfer. Record speed, curing conditions, nip setting and foil tension. Compare startup samples with steady-running samples; a slow proof does not validate a full-speed order.
What a Failed Trial Tells You
| Observed Result | First Checks | Controlled Retest |
|---|---|---|
| Blank areas or pinholes | Surface wetting, adhesive distribution and nip contact. | Compare the same image on fresh final stock with recorded laydown. |
| Filled reverse gaps or dirty edges | Plate image, adhesive spread, contact and release. | Keep artwork fixed; change one documented application condition. |
| Foil lifts after handling | Cure, surface treatment and adhesive/foil match. | Repeat the agreed adhesion check under the same conditioning. |
| Ink lifts but foil remains | Foil overprintability, ink, varnish and drying/cure. | Compare the planned ink and finishing sequence on approved transfer. |
| Passes slowly, fails at speed | Exposure, laydown stability, tension and nip. | Log a speed ladder within equipment and material guidance. |
These are starting checks, not confirmed diagnoses. For an existing production fault, use LiangyuFoil’s cold foil transfer troubleshooting checklist with photographs of the label and used carrier.
Keep a Comparable Adhesive-and-Foil Trial Record
Use this cold foil adhesive selection record for each candidate. It is a working template, not a LiangyuFoil test result.
| Record Group | Fields to Complete |
|---|---|
| Materials | Facestock code/lot, coating or treatment, adhesive code/lot, foil grade/lot. |
| Press | Model, process, unit sequence, anilox/application setup, nip and tension. |
| Cure and speed | Lamp system, relevant wavelength, recorded exposure conditions, verification method, speed. |
| Artwork and finish | Smallest detail, largest solid, target effect, overprint ink and varnish. |
| Approval | Coverage, release, adhesion, use tests, photos, retained sample and approval decision. |
FAQ
What information is needed for cold foil adhesive selection?
Provide the press process, final facestock and treatment, adhesive and foil codes, lamp system, target speed, artwork and finishing sequence. Retain the approved sample and recorded conditions for repeat orders.
Can a mercury UV adhesive run under LED?
Only if its supplier documents compatibility with the installed LED system. Confirm wavelength, exposure conditions and cure verification. A dual-cure label still requires validation on the actual press.
Is one adhesive suitable for paper, BOPP and PET?
Some products cover several substrates, but approval applies to the actual facestock, topcoat and treatment. Test each construction rather than transferring a result from one polymer or paper grade to another.
What anilox volume should I use?
There is no universal temperature. Start with the supplier’s recommended range, then test low, middle, and high settings on the actual plastic part. Watch for warping, gloss change, and edge blur.
Does LiangyuFoil need the adhesive brand before sending foil samples?
The brand and product code make a foil recommendation more useful. Include the technical data sheet, substrate, press, curing system and target effect so the sample trial reflects your production route.
Related Technical Resources:
📞 Contact our technical team → — Quote turnaround in 24 hours.
Request a Cold Foil Compatibility Review
Turn your cold foil adhesive selection brief into a foil sample trial. Send LiangyuFoil your facestock, adhesive code and technical sheet, press, lamp type, target speed, artwork and trial photos. Include roll width, quantity and destination.